Why Waimano Falls Is Worth Visiting
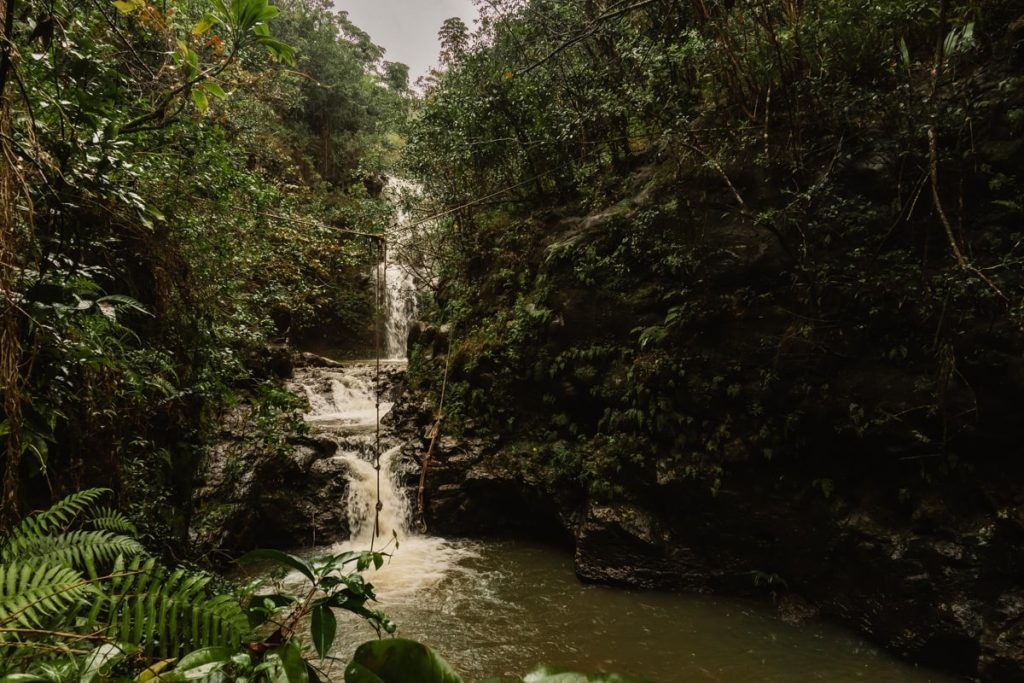
Among the many hiking trails on Oahu, Waimano Falls is like a hidden gem, perfectly blending jungle adventure with the fun of cooling off in natural pools. It’s not just a destination, but an experience full of surprises: after trekking through dense rainforest, you’ll finally arrive at the two-tiered waterfall and its emerald-green swimming hole—where every drop of sweat is rewarded.
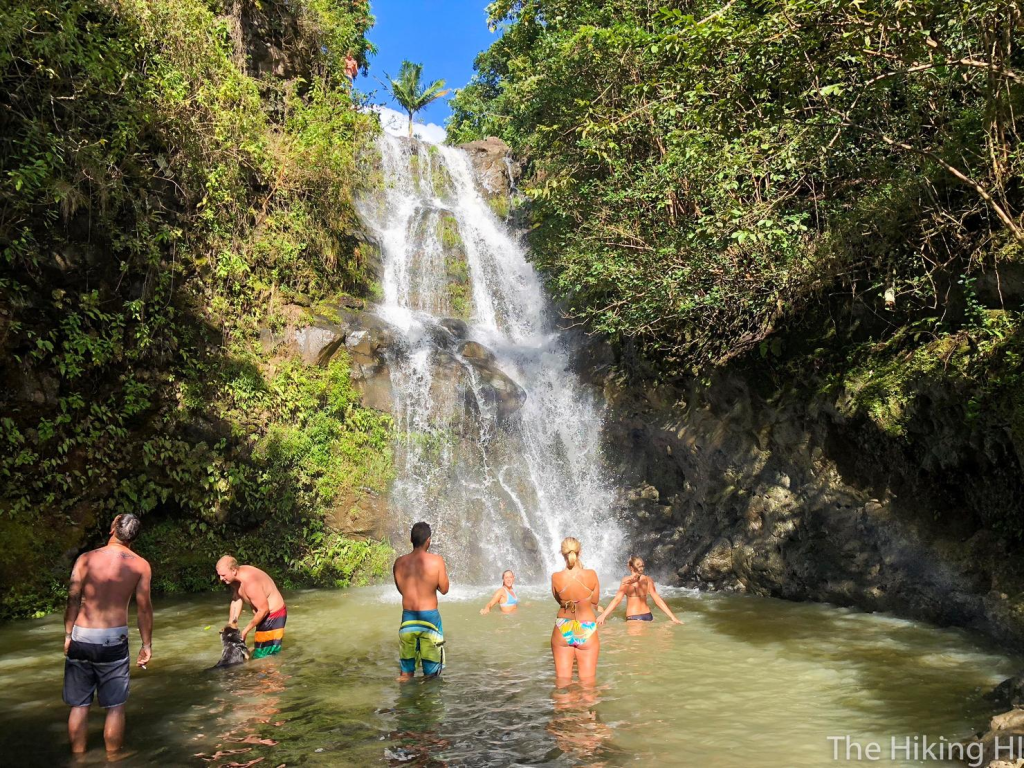
The charm here lies in its secluded waterfall, swimmable natural pools, thrilling rope swing, and the chance for cliff jumping—a perfect mix of photography, adventure, and relaxation. Compared to the crowded Manoa Falls and the longer hike to Maunawili Falls, Waimano Falls offers a more challenging and fun route while still being relatively easy to reach. It’s considered one of the best short hikes in Central Oahu.
This trail is especially suitable for:
Beginner to intermediate hikers
Those who love adventure, photography, and swimming
This guide will provide you with everything you need—from route details, parking tips, and difficulty analysis to safety notes—so you can easily plan and enjoy this trip.
Waimano Falls Hiking Trail Overview
Item Information
Difficulty Beginner – Intermediate
Distance 2.8 – 2.9 miles / 4.5 – 4.7 km (round trip)
Elevation Gain 500 – 810 ft / 153 – 247 m
Duration 2 – 3 hours (including time for photos and swimming)
Highlights Two-tiered waterfall, natural pool, rope swing, cliff jumping
Route Type Out-and-back
Traffic Moderate, more crowded on weekends
Fees Free
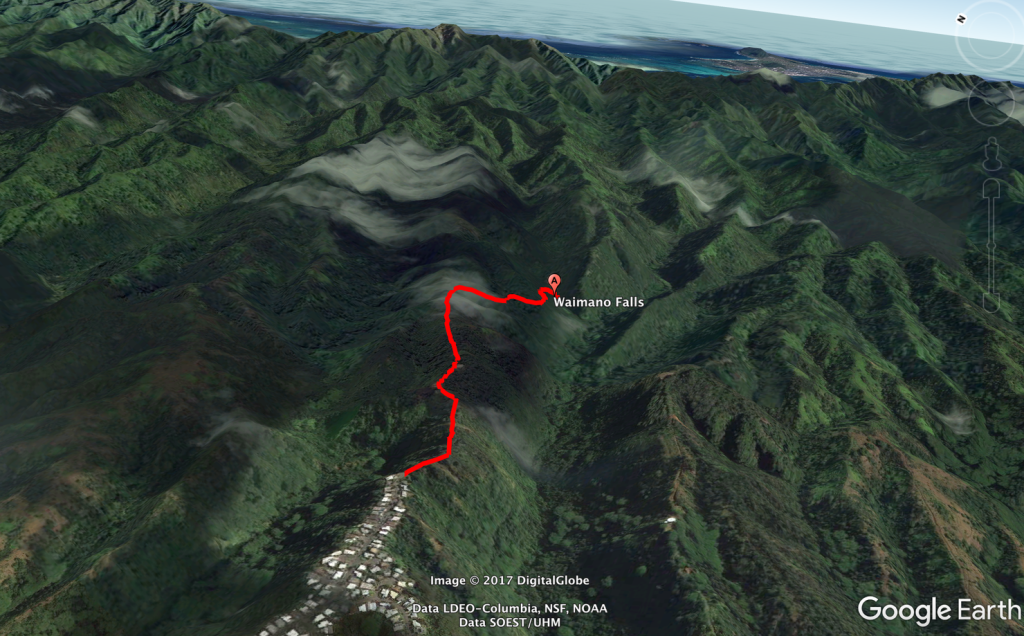
How to Get There: Directions & Parking
Location
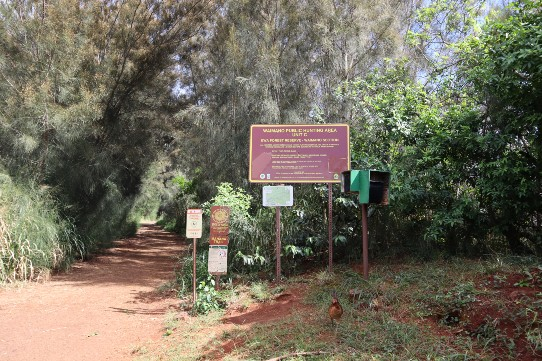
Waimano Falls is located in Central Oahu, near Pearl City. The trailhead starts at the end of Komo Mai Drive.
Driving Directions (from Waikiki)
Take H-1 West.
Merge onto H-201 West (Moanalua Freeway).
Return to H-1 West, then take Exit 10 to Moanalua Road.
Turn right onto Waimano Home Road.
Turn left onto Komo Mai Drive and follow it to the end, where you’ll see a green gate—the trailhead.
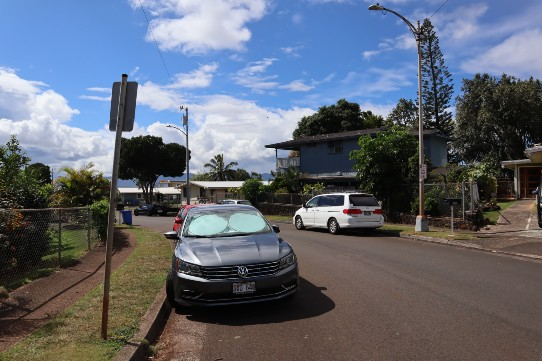
Parking Tips
No official lot—park along Komo Mai Drive in the residential area.
Do not block driveways, mailboxes, or trash bins.
Be quiet and respectful of residents.
Never leave valuables in your car.
Pro tip: Arrive before 7 AM or after 4 PM to secure parking, especially on weekends.
Trail Breakdown
Segment 1: Trailhead to Flat Section (0 – 0.5 mi)
Starts at the green gate, wide and flat path—good for warming up.
Little shade; wear a hat, sun-protective clothing, and sunscreen.
Segment 2: Forest to Junction (0.5 – 1.2 mi)
Enters dense forest, cooler and more humid.
At the first signpost, turn right for Waimano Falls Trail.
Path becomes rocky and root-covered—watch your step.
Segment 3: Steep Descent (1.2 – 1.5 mi)
The most challenging part: steep downhill into the valley.
On the return, this becomes an uphill climb—nicknamed the “Cardio Hill.”
Slippery when wet; ropes available but check stability before using.
If water flow is strong, you’ll start hearing the falls here!
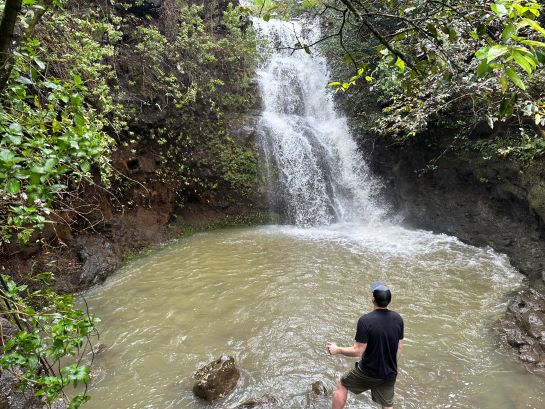
Final Section: The Waterfalls (1.5 mi mark)
Two-tiered falls await:
Lower pool: Main area for swimming, cliff jumping, and the rope swing.
Upper pool: Accessible via rocks on the left side. Shallower but offers the best views and photo angles.
Safety tip: Always check depth and surroundings before entering natural waters.
Best Time to Visit
Time of day: 7:00–9:00 AM—cool, quiet, best lighting for photos.
Season/weather: 1–3 days after rainfall for the most impressive water flow. During dry periods, the falls may reduce to just a small pool. Ask returning hikers about conditions.
Swimming, Rope Swing & Safety Notes
- Swimming in the natural pool is a highlight, but safety first.
- Cliff jumping: Only jump after checking depth and underwater hazards.
- Rope swing: Test the rope’s strength before use.
- Leptospirosis risk: Hawaii’s natural waters may contain bacteria.
- Avoid swallowing water.
- Do not enter with open wounds.
- Rinse off with soap and clean water afterward.
- Seek medical help if fever, chills, rash, or muscle aches develop later.
Packing Essentials
Item Why It’s Needed
Non-slip hiking shoes Critical for muddy, steep descents (regular sneakers are unsafe).
Bug spray Mosquitoes are common in summer.
Water & snacks Maintain energy, especially for the uphill return.
Sun protection Some exposed sections at the start.
Towel & dry clothes Stay comfortable after swimming.
Phone/camera Capture the beauty—use waterproof protection.
Photography Tips
Best spots:
- Upper pool platform for panoramic shots of the lower pool.
- Side of lower pool for action shots (swinging/jumping).
- Forest trail during golden light for dramatic sunbeams.
- Best time: Morning for soft lighting.
- Protect gear: Mist from falls can damage electronics.
- Insider Tips & Common Mistakes
Insider Tips:
- Always check weather—avoid heavy rain days.
- Early arrival avoids crowds and parking issues.
- Invest in proper hiking shoes.
- Ask returning hikers about waterfall conditions.
Common Mistakes:
- Visiting during drought—may only see a puddle.
- Wearing regular sneakers—slippery and dangerous.
- Forgetting bug spray—mosquito bites can ruin the trip.
Nearby Attractions
- Kalauao Falls: Another hidden waterfall near Pearl City, shorter hike.
- Manana Ridge Trail: Longer, wilder hike starting from the same trailhead.
- Pearl Harbor: Combine nature with history, just a short drive away.

FAQs
Q: Can you swim at the falls?
A: Yes, the natural pool is great for swimming, but follow safety notes above.
Q: Do I need a guide?
A: No, the trail is fairly well-marked, but go with a friend for safety.
Q: Is there a fee or reservation needed?
A: No, it’s completely free.
Q: When is the best time to go?
A: Early morning, 1–3 days after rain for the most scenic experience.
Final Thoughts
Waimano Falls is undoubtedly one of Oahu’s must-try waterfall hikes. It perfectly satisfies those who want to immerse themselves in nature, seek adventure, and capture stunning moments with a camera. Remember three golden rules: go after rain, start early, and wear proper shoes. Follow these, and you’re guaranteed an unforgettable Hawaiian hike!